
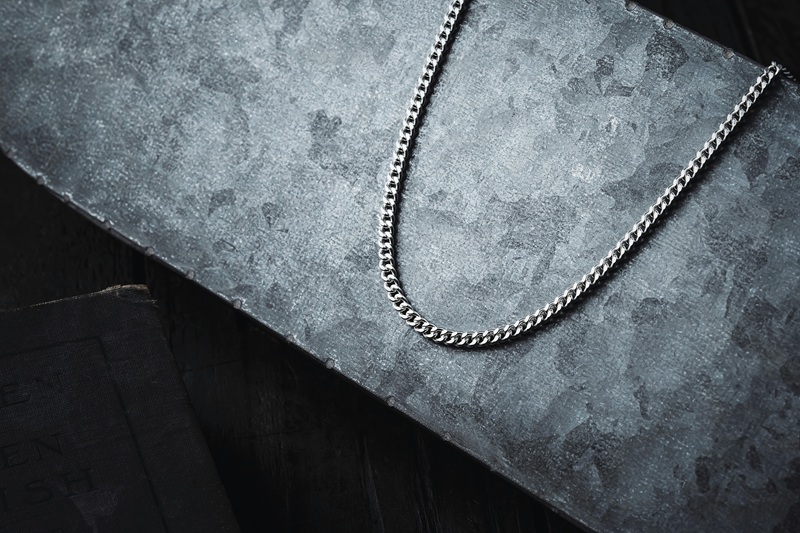
Cuban link chains look smooth and clean, but the process behind them is anything but simple. Every curve, every polish, every joint you see is the result of steady hands and sharp eyes. You don’t make a chain like this by rushing through it.
I’ve followed how professionals and hobbyists build Cuban chains from the ground up. The steps require patience and precision. If you want to understand how these chains are actually created, whether for your own project or just out of curiosity, this guide breaks it down in a way that actually makes sense.
Where It All Begins: The Raw Metal
Before there’s shine, there’s wire. Every Cuban chain starts with a raw strand of metal. Usually gold, silver, or stainless steel. That choice affects everything: the cost, the color, the strength, and how the final chain feels on your skin.
Some chains stay clean and minimal, while others become iced out jewelry with added stones. Even the thickness of the wire makes a big difference in how the chain wears.
Cutting the Right Length
Wire gets cut into short, equal pieces. Each one becomes a single link. If one is even slightly longer or shorter, the chain won’t lay flat. That’s why makers measure carefully right down to the millimeter.
On Reddit, a few DIY jewelers talk about using digital calipers just to get consistency right. It’s that detailed.
Choosing Metal Type Wisely
Different metals behave differently. Gold is softer and easier to bend. Steel is stronger but takes more effort to shape. You can’t treat all metals the same way.
That’s why makers often specialize. Some only work with silver. Others focus on gold. It’s about mastering one material instead of guessing through them all.
Thickness Dictates Style
You’ll hear a lot about “4mm” or “12mm” chains. That number refers to how thick each link is. Thicker links need thicker wire, which changes how heavy the chain feels and how hard it is to make.
Shaping the Wire into Smooth Links
After cutting, it’s time to bend. Each piece of wire gets coiled into a near-circle. This part takes steady motion and equal pressure. The goal is to make perfect circles without kinks.
Perfect links mean smoother curves and a cleaner overall look.
Making the Coil
Some people use mandrel metal rods that help shape wire evenly. Others build their own tools for tighter control. No matter the method, each coil needs to be identical.
Any change in curve size affects how the links stack later.
Sawing Each Link by Hand
Once coiled, the wire gets sliced into individual rings. That’s where jewelers use fine saw blades ones that snap easily if the angle’s wrong. It’s slow work, but clean cuts make soldering easier later.
You’ll find Reddit users comparing saw blades the way others compare gaming mice. Everyone’s got a favorite for speed and control.
Cleaning Before Assembly
Metal dust builds up during sawing. If you don’t clean each ring, the solder won’t hold well. So before any joining happens, each link gets washed, scrubbed, and sometimes tumbled to remove dirt.
Soldering Links into a Chain
Now comes the tricky part. Soldering melts metal into metal, locking each link shut. You can’t just use glue or pinch it closed. A real Cuban chain needs heat, control, and a smooth seal.
Poor soldering ruins the flow. Clean joins make the chain feel seamless.
Joining Link by Link
Each open ring gets joined to the last one, forming a chain as links build up. The position of each matters. They should align in a pattern that sits flat and bends evenly when worn.
Some makers solder two links at a time, then attach that unit to the next pair. It speeds things up but demands more accuracy.
Controlling the Heat
Too much heat melts the link. Too little, and the solder won’t bond. Jewelers use torches with fine flame control, making sure the metal flows smoothly without burning the edges.
That’s why experience matters so much here. One wrong flame and hours of work can get wasted.
Checking Every Joint
After every few links, makers inspect the joins. A weak joint shows as a dull mark or a small gap. Left alone, that link could snap after just a few wears.
You’ll see Reddit makers use magnifying visors for this step to catch problems early.
Hammering and Flattening
Once the chain is built, it still looks round. But Cuban chains are flat by design. So now, it’s time to hammer each section to achieve that signature look.
This step transforms the chain from loose loops into that recognizable, clean pattern.
Applying Pressure Evenly
Jewelry hammers and rolling mills apply pressure across the links. The idea is to flatten without warping. That requires working slowly across short sections.
Go too fast, and links shift out of place. That ruins the symmetry Cuban chains are known for.
Locking the Links Together
After flattening, the links need minor tweaks to lay closer. That tight pattern is what makes the chain shine from every angle. Makers might heat and bend small areas to get the spacing just right.
It’s less about tools now and more about feel. You watch, adjust, test, and repeat.
Prepping for Shine
Before polishing, the chain gets its final checks. Are the links even? Are they sitting flat? Any bulges or sharp spots need grinding down before the final step.
Reddit threads often mention this part as the most annoying, but the most rewarding once done right.
The Final Polish and Clasp Setup
Polishing brings the piece to life. It’s where the gold glows, the silver shines, and the chain finally looks ready to wear. No shortcuts here. A bad polish hides nothing.
You want that clean finish to feel as good as it looks.
Using Different Buffing Tools
Makers use wheels, compounds, and clothes to bring out that mirror-like shine. They start with rough polish, then move to finer levels. It’s like sanding wood; each pass smooths things further.
A good polish also removes micro-scratches that can dull the chain under light.
Adding the Clasp
Most Cuban chains use box clasps with side locks. These hold tight and match the chain’s flow. Some use lobster clasps instead, depending on chain size and user preference.
Attaching the clasp is the last solder step. After that, the piece is complete.
Final Touches and Testing
Once finished, makers test the clasp, bend the chain, and wipe down the entire piece. If it passes every check of strength, shine, and fit, it’s ready to wear.
Many Reddit users post side-by-side photos showing “before polish” and “after.” The change is always huge.
FAQ
How long does it take to make a Cuban link chain?
Depending on the tools and thickness, it can take anywhere from 5 to 20 hours for a full chain.
Do I need expensive tools to make one?
No, but you need precision tools like a jeweler’s saw, torch, and polishing wheel to get a clean finish.
Is it hard to make a Cuban link chain at home?
Yes. It takes practice and patience, especially during soldering and polishing steps.
What’s the best metal for beginners?
Start with copper or brass. They’re cheaper and easier to work with than gold or steel.
Can I make a Cuban chain without soldering?
Not really. Proper joins need solder to keep the links from opening over time.
Final Thoughts
Building a Cuban link chain from scratch takes more than time; it takes care, control, and an eye for balance. You start with wire, and you end with a piece that carries weight, shine, and real pride.
Now that you’ve seen how to make a Cuban link chain step by step, you understand what sets it apart. And next time you see someone wearing one, you’ll know exactly how much work went into every link.
It’s not just a piece of jewelry. It’s a piece of effort worn with purpose.